Grilled Chicken 101: What You Should Know
Many people ignore chicken when it comes to grilling because they consider it to be a little bit blander in taste compared to any other meat, and also because it is quite a tricky journey to get the hang of the white meat of the chicken isn’t raw, it’s just the right amount of moist, and the dark skin isn’t ready to be eaten, it is very much undercooked.
However, what they don’t know is that the mild taste of chicken makes it easier to be able to blend, mix, and match with other flavors- it adapts so well! And the trick to getting the best of both worlds in the white and dark meat department is to not let the white meat dry out while the dark meat is cooking through.
You might think it’s hard, but it’s all about the dry rubs, the technique of grilling the chicken, and the right heat.
What should you put in the dry rub
Before we get into it, we’re going to say it directly: don’t use sugar if you’re grilling your chicken, especially if you’re grilling it with the skin on. Why? Because sugar can result in burning when it is cooked by a high heat source, and the chicken’s skin can easily burn before the meat is even cooked when the heat is too high.
The traditional and simple chicken dry rubs you should be using are:
- kosher salt
- black ground pepper
- smoked paprika
- garlic
- dried thyme
If you’d like to add different spices, there are more that work just as well! Some of them are:
- sea salt
- cayenne pepper
- dried sage
- onion
Which techniques should you be using when grilling your chicken
Grilling chicken is a tricky ordeal, we’ve already established that; you could have everything under control and going so well until you don’t. Because you’ve got to pay attention and care to the white meat, the dark meat, and the skin- it can easily become overwhelming.
This is why we believe that the best technique to use when grilling chicken is one that is not completely unfamiliar (especially if you’re in charge of doing the turkey during Thanksgiving!): butterfly your bird! Or, spatchcock, as some may know it.
The butterfly technique is when you cut the meat into almost two pieces, but leave two parts connected. True to its name, huh? Once done, the meat is boned and flattened.
The spatchcock technique is not all that different: you also prepare the meat for cooking by cutting it into almost two pieces but leave two parts connected to each other. The difference, though, is that when you ‘spatchcock’ your bird, you remove the backbone and then you flatten it.
The big plus of these techniques is that once you have flattened your chicken, it can cook more evenly, as well as make the skin a lot easier to work with, as it would come out crisped rather than buttery.
- Your chicken would cook more evenly since it means that the breast meat and the thigh meat are on the same level, so they’d be cooking at the same rate together. This process allows the dark meat to properly cook to your preference without the white meat drying out. It’s a perfect balance!
- The skin of a chicken is one of the biggest problem areas when it comes to grilling it- it can very easily turn out flabby or burn. However, by using these techniques, most of the chicken’s skin is exposed and facing the same direction, away from direct heat. No buttery or burnt skin, only crispy! Some have noted that the spatchcock technique works especially well when it comes down to crispy skin.
If you’d like to get a little fancy and put on a cool display for your guests, there is also another technique that is called ‘chicken- under- a- brick’. Quite literally, you put two bricks covered with tinfoil over the chicken’s body. This technique helps you know for sure, that your chicken is really coming out cooked evenly on all sides, as the bricks flatten the chicken more and result in delicate skin and luscious meat.
What is the right temperature to have the perfect chicken
As we mentioned before, the meat and skin of a chicken can be confusing. White doesn’t equal raw, black doesn’t equal done, and burnt skin doesn’t mean your food is cooked through and through!
If you’ve tried grilling a chicken before and had the skin burn- then opened it to see that meat was still raw: that means the temperature was set too high.
And if you grilled a chicken again after that and tried to learn from your mistake- but the skin came out flabby and buttery? You had set the temperature too low.
I know when grilling, especially with family and friends, it’s great to be able to grill hot and fast and get to the eating and catching up part. But when grilling chicken, it’s much nicer and better to take it low and slow and place your chicken over indirect heat.
The perfect temperature you should set your grill to pre-heat and maintain while grilling is 350 °F, and/ or around that temperature; placing your chicken on the area of your grill that has indirect heat will cook the chicken without charring it or burning it before the whole thing is done cooking.
What are the best chicken parts to grill
We will break down what parts of the chicken to grill, how to grill them, and what to pair them with.
- Breast (bone-in or boneless)
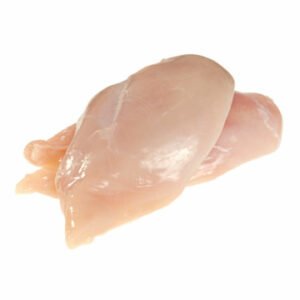
Grilled chicken breasts, whether bone-in or boneless and skinless, are one of the all-time favorites of all grilled-chicken lovers. With this specific piece of chicken, you can put any spice or dry rub you want: some people like to get creative and add cheddar and jalapeno, or go the traditional way and add kosher salt and pepper- paprika is known to give your chicken a wonderful color!
If you’re grilling a boneless and skinless chicken breast, you should rub the spices right onto it and then grill for 8 to 12 minutes if you’re using a 6- 8oz breast over indirect medium heat (350 °F).
If you’re grilling a chicken breast with its skin and bones still, you should rub the dry rub under the skin- otherwise, the spices will come right off and won’t leave much of a flavor; grill the chicken breast over indirect medium heat for 30 to 40 minutes if you’re cooking with a 10- 20oz chicken breast.
- Thighs
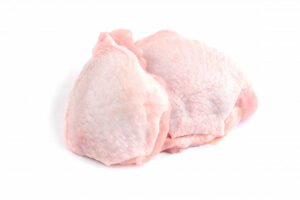
Another well- known and well-loved chicken parts for the grilled chicken fanatics, the thighs. These specific pieces are faster to grill as it’s preferable and recommended to grill over direct medium-high heat of 400 °F to 450 °F
If you’re grilling boneless chicken thighs: place them over direct medium-high heat of 400 °F and grill each side for 3 to 4 minutes. Overall, it should take you 8 minutes when grilling boneless chicken thighs.
If you’re grilling chicken thighs with the bone in, place them over direct medium-high heat of 450 °F and grill each side for 3 to 5 minutes. Overall, it should take you 10 to 13 minutes when grilling bone-in chicken thighs.
*if you choose to grill your bone-in chicken thighs over indirect medium heat of 350 °F to be safe and make sure you don’t burn them, you can! It should take you 30 to 40 minutes.
- Drumsticks

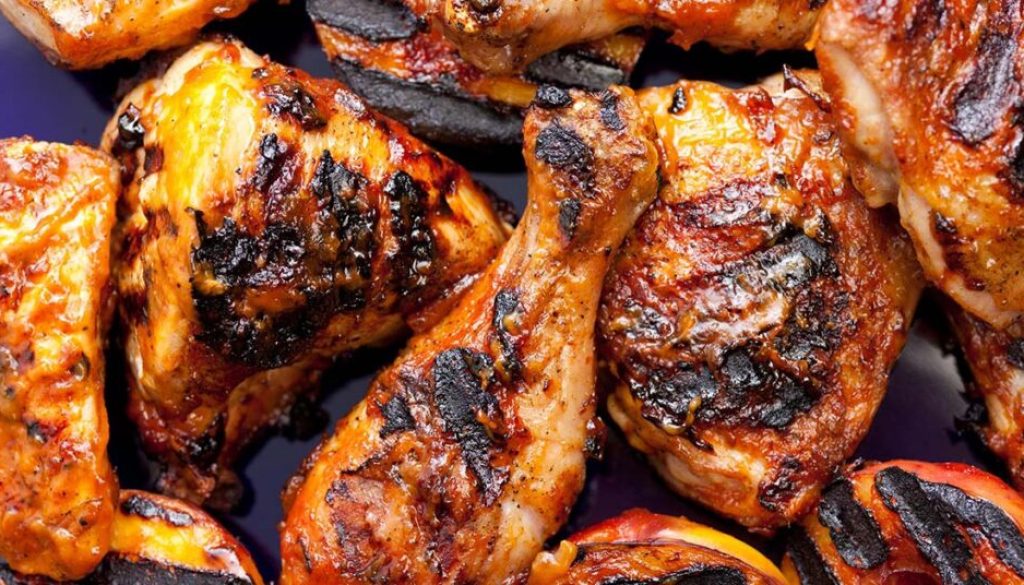
Drumsticks are known to be easy to make compared to any other chicken cuts, and they taste great with barbeque sauce.
Simply get your heat up to 375 °F- 400 °F (anything in between works) and switch up the usual dry rub of salt and pepper by adding garlic in, too! Place them over direct heat and flip them every 5 to 7 minutes (as you deem fit), for 30 to 35 minutes.
Once done grilling, take them to an area of indirect heat or off the grill altogether, and take out your favorite BBQ sauce, or get creative by making your own at home! Once the sauce is set and slathered all over your beloved drumsticks, place them again on the grill for 5 to 10 minutes, until the sauce begins to caramelize.
- Wings
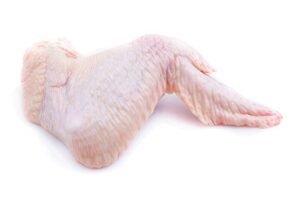
Chicken wings are famously infamous- without a doubt. Everyone knows them, everyone loves them, and everyone craves for them at least once a month. So, grilled chicken wings? Yum.
Bring out the chicken wings you’ll be grilling, rub the salt and pepper, and start grilling over direct medium heat of 350 °F for 18 to 20 minutes. Once done, drizzle any sauce of your likings, like honey BBQ sauce or garlic parmesan sauce, and enjoy a good football game!
note: how long you should leave your chicken on the grill depends on the size and thickness. What we’ve given you is an estimation.
General tips when grilling Chicken
Before we get into the chicken- parts talk, we’d like to cover ground on some things:
- Having skin on your chicken is absolutely up to you! While we prefer our chicken with skin, as it gives a tasty and crispy texture when grilled properly, you can opt for a skinless chicken and still be able to follow everything we’ve mentioned before regarding dry rubs, technique, and heat, as well as what we will be mentioning regarding the cuts of chicken.
- You can leave the bone in your chicken, or take it out! Grilled chicken fanatics recommend leaving the bones in, however, as bones and skin can help prevent the meat from overcooking (especially for chicken breasts, the bones protect it from the strength of the heat) and make the meat taste much better.
- You can buy a whole chicken and then cut it up as you wish from the comfort of your home, just as you can also ask your local butcher to cut the pieces up for you or buy only specific parts alone.
- Use your grill as if it is an oven; put your chicken or your chicken pieces onto the grill grates, put on the lid, and watch and wait. Like an oven, when it is closed with the fire up and running, the heat will radiate on all sides, below and above, equally cooking your chicken thoroughly. Another big plus of closing the lid is that it will help prevent flare-ups caused by air, seeing as it controls airflow.
- Keep an eye on your chicken as it cooks, seeing as the fats will drip onto the coals, which causes flare-ups occasionally. Be ready to move your chicken away from the high heat to prevent it from burning.
- Leave the marinade for later: the reason we stick to dry rubs is that the marinade can easily turn your chicken to a gray color and smoke too much.
- You can leave the dry rub on your chicken for up to 4 hours; however, we recommend rubbing and grilling right after, since that way, the flavor and dryness of the herbs will be fresh and strong. Leaving the dry rub to sit for long hours before grilling will get rid of the dryness and only cause a mess in your kitchen.

