How To Smoke Meat In Your Oven
Sometimes, you might start craving some hot, smoked ribs- but fulfilling that craving might be a bit of a challenge if you don’t have neither a charcoal grill nor a smoker.
The bright side is that, with the right guidance and techniques, you can actually use your oven as your own home- made smoker! Here are some tips on the basics of smoking in an oven, and how to do it.
What do you need to prepare beforehand?
You won’t be doing a whole different thing here- you’re going to be smoking meat, which should be familiar enough if you’ve smoked in a grill before, or watched tutorials.
So, just as you would prepare the necessary items for smoking in a smoker, you should prepare them for a smoking session in the oven.
- Prepare your desired cut of meat with the dry or wet rub you own, and if possible: allow it to sit for a couple of hours (do not allow the rub to settle in for longer than 6 hours, as then it will become mushy and pasty).
- Prepare the wood you’re going to be using; since you will be using an oven, you can substitute logs of wood for wood chips (of your pick, of course. apple wood and cherry wood are known for their sweet taste, just as mesquite and hickory are known for their strong smoke flavor).
- Cover a baking pan with aluminum tinfoil, or use an aluminum metal pan.
- Move one of the metal baking racks lower inside the oven, then place the other baking rack on top. Make sure to keep a considerable amount of space in between them (you will see why later).
Time and Temperature:
Smoking meat is a long, time-consuming process that needs your attention and dedication. When smoking in an oven, you can easily attain tenderized, smoky meat all over within less than 10 hours.
However, to achieve that result, there are certain things you need to take into heavy consideration, seeing as one mistake can easily take your meat from being perfectly tasteful, to horrendously tasteless.
The flavor of the meat is enhanced when it is surrounded by a thick layer of smoke; to achieve this, you need to take two things into consideration: the size of your meat, and what kind of meat you’re smoking.
- Never begin the process of smoking any meat at a high temperature. Instead, start with a low temperature so that the meat can drink in the smoke equally on all sides, the hard fibers of the meat break down completely, and the collagen fibers of thick and hard cuts of meat cook.
- Typically, the ideal temperature to smoke in your oven is somewhere in between 200° F and 250° F.
- If what you’re smoking is chicken, turkey, or fish then the initial temperature you should be smoking with must be somewhere in between 145° F and 165° F.
- Once you’ve noticed your meat is mostly cooked and smoked, you can kick the temperature up a few notches for a couple of minutes.
As for the temperature to time ratio, if you set the temperature to 250° F to 300° F, your food would be done in about 3 hours- depending on the size, thickness, type, etc.
Let’s get to cooking, shall we?
1st STEP: Soak your wood chips.
Soak the wood chips you will be used in water for at least an hour. Once you’ve noticed the wood chips are thoroughly soaked, drain most of the water, and keep what’s left of it in a container.
2nd STEP: Preheat your oven.
Once the wood chips have been taken care of, pre-heat your oven to (preferably) 250° F.
3rd STEP: Get the wood chips fired up.
Bring in the tinfoil- covered baking pan you prepared (or the aluminum metal pan you own), and start placing the previously- soaked wood chips at the bottom.
Do not stack the wood chips over each other, as the heat and smoke from them will be too strong. Instead, only fill the pan you’re using halfway through, and make sure that the water is making some sort of film with the wood chips. This way, you’re ensuring you have the right amount of wood chips placed to give out the right amount of smoke.
4th STEP: Make sure there is enough space between the racks.
Since you’ve placed the metal baking rack that contains the baking pan with wood chips as low as possible, you should take the metal rack you’ll be placing the meat in, and place it above it- high enough for the smoke from the wood chips to flow freely.
5th STEP: Bring out the meat.
By now, the meat should have been prepared with the rub and allowed to soak in for at least an hour.
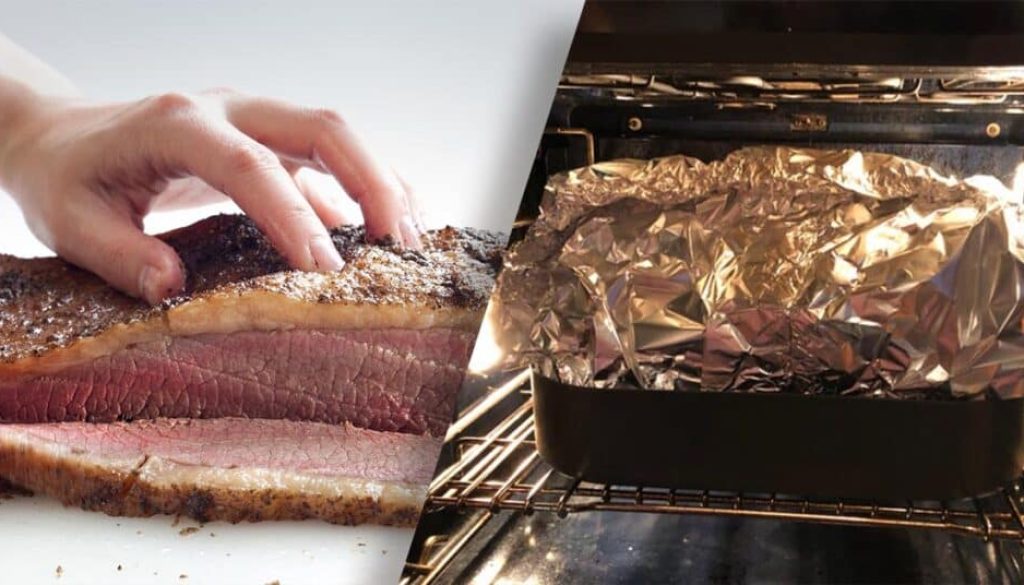
Place the meat in a roasting pan, and use aluminum tinfoil to create a ‘tent’ shape. This tent-like shape you’ve created should cover all sides of the roasting pan, and still have room in the top for the smoke to circulate over the meat.
Take into consideration that the tighter the foil in the roasting pan is sealed, the more the smoke and flavor of the wood will be soaked into the meat.
6th STEP: Place the meat in the oven.
You have prepared the meat in its little aluminum foil tent, and now it’s ready to go into the preheated oven.
Of course, depending on the size, thickness, type, and amount of meat you’re smoking- you should let it cook slowly in your oven for 3 to 6 hours to achieve a thorough cook and smokiness.
7th STEP: Keep an eye out for the oven.
Since you have placed a baking pan (or metal pan) with a bit of water over the fire, for at least three hours: you might notice that the water may have evaporated completely or become absorbed by the wood chips you placed inside the pan. Without the water, the wood chips will dry out, and as a result, so will your meat.
This is where the bit of water from when you soaked the wood chips at first comes in. Bring out the container you poured the wood chips’ water in, and pour some of it into the pan- thus wetting your wood chips again and re-creating the film of water at the bottom of the pan.
8th STEP: Check the internal temperature.
Once you’ve noticed that the meat you’re cooking is cooked to your preference and well smoked, take out a meat thermometer and insert it in the thickest part of your meat to check the inner temperature.
If you see that the internal temperature is safe (never eat undercooked meats! They are dangerous for your well- being) and it complies with that of the recipe you’re following, take out the meat.
Allow it to cool down slightly, and then dig in!


